If you are constantly on the go, whether hiking, cycling, or enjoying long walks, stopping now and then to sip on some water may slow you down or even frustrate you. The hydration bladder for backpacking can be a useful companion in such times to keep you refreshed effortlessly on the go.
Hydration bladders go hand in hand with compatible backpacks that feature an insulated sleeve or pocket for the reservoir. I hope this article provides you with all the necessary information to help you get one for your next adventure.
Quick Navigation
ToggleWhat is the Best Hydration Bladder for Backpacking?
We have compiled for you the top 5 Best Hydration Bladder for Backpacking in 2024. In this article we go through the products that we have used ourselves, checked what other users thought about them and we ranked them accordingly.
With years of experience with backpacking water bladders and having used several hydration bladders for backpacking you can trust our review.
Moreover, you can scroll to the end of this review to see our mini buying guide as well as the answers to some of the frequently asked questions about hydration bladders for backpacking.
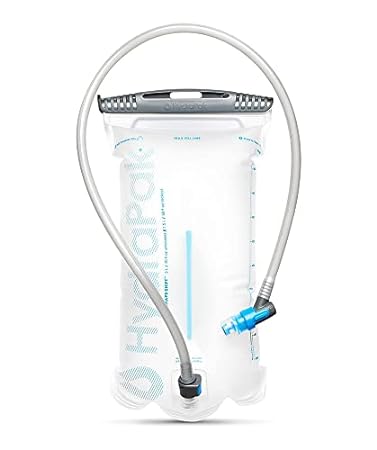
1. Hydrapak Shape-Shift Reservoir

The Hydrapak Shape-Shift Reservoir is my top choice for its smart features and reliable performance. The shape-shift design used on this hydration bladder features an adjustable baffle that allows you to clip the reservoir walls together in the middle to create a slim profile and unclip it to increase fluid volume or to clean and dry it.
The bladder also features a patented wide slide top opening that allows you to refill the bladder quickly and turn it inside out for cleaning. It features a 0.25 mm thick thermoplastic polyurethane construction, which makes it durable and flexible. The material is also BPA and PVC free for both the 2L and 3L size.
Another convenient feature is the Pug-N-Play connector that allows you to quickly disconnect the drinking tube for convenient refilling while preventing leaks. It also has its downside because some users have had problems with leaks from faulty connectors. However, you can get free repair or replacement for any defective parts from their excellent customer service.
Pros
- Features a high flow bite valve, Reversible for easy cleaning and drying,
- Durable construction with lightweight TPU material,
- Free repair and replacement in case of any failures
Cons
- May leak at the bottom valve,
- Baffle does not lock back easily
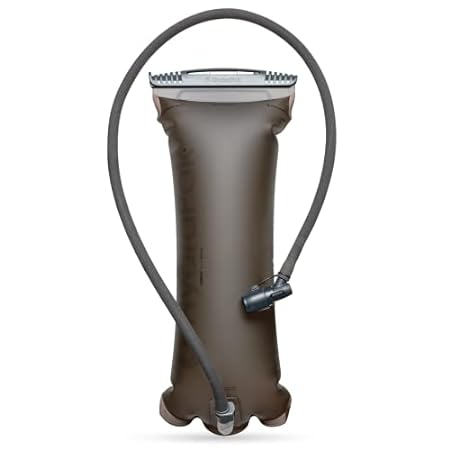
2. Hydrapak Force Ultra Hydration Bladder

This military-grade backpacking water bladder features durable construction with premium, abrasion-resistant TPU material and welded seams that allow for superior elasticity. It is also safe to use as it is 100% BPA and PVC free, and users have noted that it does not have the plastic taste that you would find in TPU bladders. You can enjoy your water while it is cool since the flexible Hydra Fusion drinking tube is insulated. The mouthpiece features a twist on and off valve that also comes with a snap-on dust cover. It also features a leak-proof slide-seal top opening that makes the water reservoir reversible for cleaning and allows for easy refilling.
Pros
- Heavy-duty and abrasion-resistant construction,
- Insulated drinking tube to keep the water cool,
- Slide-seal top allows for easy cleaning,
- Comes with a bite valve snap-on dust cover,
- It comes with a lifetime warranty
Cons
- It has no/off valve on the drinking tube connector,
- The drinking tube maybe 1-2 inches short
3. Unigear Hydration Bladder Reservoir
The Unigear water bladder offers premium quality, as it features high-quality food-grade TPU construction that comes taste-free and odor-free. The reservoir has been tested to ensure that it is leak proof. However, some users have noted that the screw cap closure may not seal completely, which may cause leaks.
If you are on a tight budget, this may be the best hydration reservoir for you. It features a low profile design that fits easily into your backpack. The baffle construction also reduces sloshing and makes the bladder stable during high impact activities such as running. It also features a large hole opening that enables you to clean your bladder with ease, plus it comes with a 4-piece cleaning kit included in the package.
The bladder comes with a durable and soft mouthpiece that allows you to sip your water effortlessly. It has an on/off shut valve that some users have noted that may also cause leakage. It does come with a 40-inch tube that is more flexible to use than the 36-inch Hydrapak hydration tube. However, Unigear gives a 180-day warranty on the hydration reservoir that is much less than the Hydrapak lifetime warranty.
Pros
- It has a low-profile design that reduces sloshing,
- Includes a 4-piece cleaning kit,
- Soft mouthpiece that delivers fast water flow, It comes with a large opening, thus easy to clean
Cons
- May leak at the mouthpiece,
- Screw cap closure does not seal properly sometimes
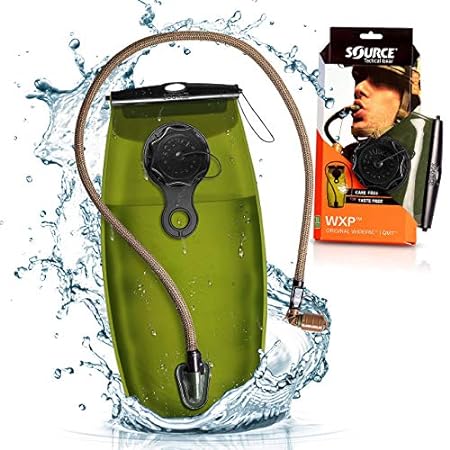
4. Source Hydration Bladder WXP
The Source hydration bladder WXP features a wide slide opening and a screw cap opening that gives you versatile options to fill and clean your bladder with ease. The drinking tube features a UV-blocking weave cover that delivers excellent performance in keeping your water cool.
This bladder comes with a no-bite push-pull valve with an integrated shut-off mechanism, which some users may find inconvenient to use compared to a helix bite valve. However, I like the quick release mechanisms that allow you to disconnect the mouthpiece and drinking tube without leakage. The GrungeGuard Technology is a self-cleaning mechanism that inhibits dirt inside the reservoir to keep the water clean and taste-free even if you leave it inside the bladder for days or weeks.
Pros
- Grunge Guard technology keeps the bladder bacteria free,
- Bladder keeps water fresh for weeks, Taste-free polyethylene construction,
- Features both wide slide opening and screw cap opening
Cons
- Storm valve mouthpiece requires effort to use,
- The drinking cap may leak
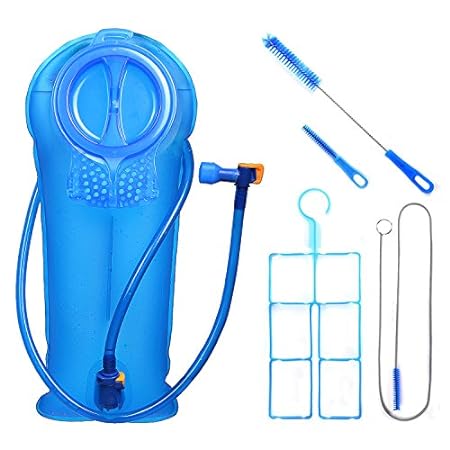
5. Wacool Hydration Pack Bladder
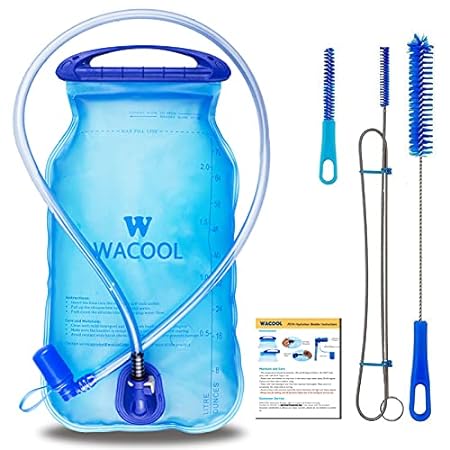
The high-quality material used on this hydration bladder is BPA-free, tasteless, and odorless. It also comes with a cleaning kit with one flexible tube brush, a bigger brush, one extra bite valve, and one collapsible drying hanger rack. The Wacool hydration pack bladder features a rigid profile since it comes with a 0.6mm extra thick liner. It helps the bladder handle pressure from compression without bursting and also improves durability. It features a wide top opening design that enables you to refill and clean it easily. The quick-release mechanism on the hose, together with the 90-degree twist and pull soft silicone mouthpiece, make this bladder extremely easy to use on the go.
Pros
- Designed with a wide top for easy cleaning and refilling,
- Military-grade construction with tasteless PEVA material ,
- Comes with a 4-piece hydration cleaning kit,
- (0-degree rotated soft mouthpiece
Cons
- The measurement markings are slightly off,
- The bladder may leak from the tube connector
Verdict
To summarize, we have gone through dozens of hydration bladders for backpacking and decided that 5 are worth your consideration. Out of these, the absolute Best Hydration Bladder for Backpacking is Hydrapak Shape-Shift Reservoir which we highly recommend as our overall best.
If money is not an issue, you can consider Hydrapak Force Ultra Hydration Bladder as this is our Premium Pick.
Otherwise, there’s no shame in spending prudently, Unigear Hydration Bladder Reservoir is the Budget Option.
Our other reviews you may find useful in your research:
What You Should Know Before Buying hydration bladders for backpacking
Weight and Compatibility
If you are an ultralight hiker, then you would know that every ounce counts. Water bladders weigh differently depending on their construction, and it is not uncommon to find a 2L unit that weighs more than a 3L one. Water reservoirs that weigh below 250g may be a good bet because they can deliver a decent balance between weight and quality.
Hole Opening
It is important to note that the ease of filling or even cleaning a hydration bladder will depend on the type and size of the hole opening. I recommend the fold top design as it is the most convenient. It is a wide opening that allows you to fill in the bladder quickly, and you can also easily clean it by flipping it inside out. Zip top bladders are also popular but may give you a more challenging time cleaning since they cannot flip inside out. The snap cap closure is also a typical design, but it also does not allow for easy cleaning.
Ability to Replace Components
As you buy your reservoir, ensure that the components are readily available in the market. Also, consider if the manufacturer provides accessories such as cleaning kits and tube insulators for cold weather. It will ensure that you can easily replace the parts and maintain your unit.
What are the key benefits of hydration bladders over water bottles?
With a hydration bladder, you can access water easily without having to stop or slow down like you would when using a water bottle.
Questions and Answers About hydration bladders for backpacking
What is the best capacity hydration bladder for backpacking?
Depending on how long you are on the move, I recommend that you get a bladder with sufficient capacity to sustain you until the next time you can refill. However, the 3L reservoir gives you most versatility because you can fill it halfway for short hikes or to full capacity when you need more water.
Can you put ice in a hydration bladder?
If the hole opening is large enough, you can add ice cubes to your hydration bladder. However, adding too much ice may cause your bladder to freeze, so I recommend just filling it halfway with ice. If the hole opening is too small, you can opt to toss your reservoir in the freezer, but make sure to remove it before it gets frozen.
How do I clean my hydration bladder?
Bacteria and mold can easily grow in your hydration bladder and proper cleaning is therefore vital. Wash your hydration pack with warm water and soap or baking soda. For complete cleaning, you may leave the cleaning solution in the bladder for about 30 minutes. The brushes included in cleaning kits are great for cleaning out the tubes. You might want to go a step further and use a sterilising solution on your reservoir and tubes. It is extremely important that you allow your hydration bladder to dry sufficiently as moisture provides the perfect breeding environment for bacteria and mold.
How do I get the plastic taste out of my hydration bladder?
Cleaning agents such as soap and baking soda may help get the plastic taste out if you soak for a few hours or overnight. Another popular method is to use a combination of baking soda and lemon or lime juice. In this method, use two tablespoons of baking soda and two cups of lemon juice for every liter of water until the hydration bladder is full. Let the mixture sit for at least a few hours or overnight for maximum effect.
